Thursday, 28 March 2013

cont' WEEK 6 : Motion Guide & Frame by Frame

MOTION GUIDE

Kali ni lebih exciting sebab nak create animation paper airplane yang sedang berterbangan *teringat plak lagu kapal terbang kertasku*..hah sabar2 kak jah oii, nak tunjuk la ni..

1. Draw a airplane and turn on the 'Snap to object' option.


2. Convert your airplane image to movieclip by click on 'Modify', 'Convert to symbol' and choose movieclip.
3. Right click on frame 50 and 'Insert keyframe'. Now you can drag to change the position of the airplane.
4. Right click on any frame between frame 1 and frame 50, select 'Create Motion Tween'.
5. Click on 'Add motion guide' and select the 'Pencil tool' to draw the motion guide.
6. Click on frame 1 of the paper airplane layer as the beginning of the motion guide and click on frame 50 and placed the airplane image to the end of the motion guide.
7. Rotate the airplane image by click on frame 1 and select 'Free transform tool' to rotate the paper airplane.
8. Do the same step for frame 50.
9. Lastly, click on frame 1 again and tick on 'Orient to path'.
10. Double click on 'Frame rate' and change to 48 for example.

Macam x realistic sgt motion kapal terbang kertas ku huhuhu

I do the same steps for the following animation:

ACTIVITY 3: NO 3
The ant move along the tunnel

FRAME BY FRAME

For animation by using frame by frame technique, I try to animate the cartoon's mouth.

1. Draw the face of the cartoon completely without its mouth.
2. Draw various type of mouth,including smile, sad, etc. Convert each of the mouth to graphic symbol.
3. Insert keyframe on frame 1, and drag the smile mouth (for example) to the stage.
4. Insert keyframe on frame 2, and drag the sad mouth (for example) to the stage.
5. Repeat this step for getting the animated cartoon's mouth that you need.

ACTIVITY 3: NO 4

At last, dapat jugak menyiapkan semua task..I have learned so many things through this activity, really appreaciate it.. *lega*

Wednesday, 27 March 2013

WEEK 6 : Button & Animation

No class for this week 4, tapi ade ipad kan, so self-learning la guna apps yang dah ade dalam ipad tu, no excuse ok.. kalau ade problems boleh terus post kat fb group sebab ramai yang sudi membantu kat sana..TQ kak fana & kawan2 =)

Ok, previous entry x sempat nak story pasal button.. button ni elemen yang sangat penting as a function to allow the content in flash to interact..  For drawing a button, we can use various shape from the rectangle primitive or oval primitive tool..  yang paling penting sekali bila dah siap button mengikut bentuk dan warna kesukaan, kita mesti convert to symbol.. Tau x nak convert macam mane?? Kalau x tau saya tunjukkan ye hehe..
Click ‘Modify’, then choose ‘Convert to symbol’..senang je kan..
Kita boleh jugak tukar warna button bila cursor roll over the button, atau warna button jugak boleh ditukar bila kita click pada button tersebut..ala macam button dalam laman web ataupun cdrom yang kita selalu tengok tu..
  1. Double click pada button, timeline akan muncul ‘Up’ , ‘Over’ , ‘Down’ and ‘Hit’.
  2. Bila kita nak tukar warna button bila cursor roll over it, insert keyframe pada ‘Over’ state then boleh la tukar warna yang disukai.
  3.  Untuk tukar warna bila kita click pada button tersebut, insert keyframe pada ‘Down’ state dan tukar warna button.‘Hit’ state pulak kita guna untuk limit kan kawasan yang boleh di click oleh mouse. Hand cursor hanya muncul pada kawasan yang dihadkan pada ’Hit’ state
  4. Kita boleh try tengok hasil kerja kita dengan cara;                                                                                     
     Click ‘Control’ and choose ‘Test Movie’.
Ini contoh button saya =)


Nampak x warna button bertukar bila cursor digerakkan pada button, tapi hand cursor tak dapat di print screen plak, so x nampak la hand cursor kat button tu.. kalau nak nampak tu you olls kena try sendiri la gamak nya hehe..

Ok untuk apps3 pulak, kita explore macam mane nak create animation.. first of all, kena tau yang ade tiga jenis symbol iaitu graphic, button and  movie clip..

macam mane nak create graphic symbol?? ade dua cara, sama ade draw sendiri atau pun import je daripada file kite yang sedia ade.. nampaknye pilihan yang mudah ialah import daripada file yang dh ade la kan, almaklumlah, tangan masih kaku untuk melukis sendiri hehe.. ok check this out ok..

1. Click 'File', select 'Import' and select 'Import to stage'.
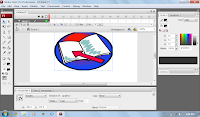
Ini graphic symbol saya =)


2. Choose the image from your file, then click 'Open'.
3. Now your image is already on the stage.
4. Next, click 'Modify' and select 'Convert to symbol'
5. Choose 'Graphic' as symbol type, and click 'Ok'
6. Lastly, try to do it by yourself k, jangan bace je hehe..


Next, nak explain on how to create a button symbol..

1. First, click 'Insert', then select 'New symbol'.
2. Boleh pilih shape, color and of course text untuk button tu.

Kita boleh jugak tukar warna bila cursor roll over the button, atau warna button jugak boleh ditukar bila kita click pada button tersebut. Step2 nya dah saya explain awal2 entry ni, so sama je step nya ok..

Movieclip symbol? Dengar nya macam susah dan gerun kan.. xpe2, ini la nama nye cabaran, kalau senang je bukan learning process la kan.. fighting2 =D.. So untuk movie clip ni, nak buat butterfly yang sedang mengepak2 kan sayap nya, *serius ni*

1. Click 'Insert', select 'new symbol', change the type to 'Movie clip' and click 'Ok'.
2. Select 'Oval tool', and start drawing the body of your butterfly.
3. Ok next, we will draw the left wing of the butterfly, so click 'Insert layer'.
4. Choose 'Rectangle tool' to draw the left wing. Use 'Selection tool' to modify the wing shape.


5. Complete the wing by using 'oval tool' to draw the lower part of the left wing.
6. Select all for the left wing and click on 'Modify', 'Convert to symbol', choose 'Graphic' and click 'Ok' to convert the left wing to graphic symbol.
7. Right click on the timeline and 'Insert frame' to frame 60 for each layer.
8. Copy frame 1 and paste it to frame 10, 20, 40 and 60 for example.
9. Click on frame 10 and shrink the wing.
10. Right click any frame between 1 to 10, then click on 'Create Motion Tween'.
11. Copy frame 10 and paste it to frame 30 and 50. Don't forget to 'Create Motion Tween'.
12. Insert a new layer, and drag the left wing graphic to the stage. Choose 'Free transform tool' and change the rotation for your right wing.


13. Do the same steps for your right wing on the frames.
14. Test your movie clip by click 'Control' and 'Test movie'. 

See..my butterfly is flipping its wings ok hehe *excited*!!!! 

MOTION TWEENING

Masuk bab Motion Tweening Object plak ok.. kali ni nak discuss macam mane nak wat motion contoh nya bouncing ball..

1. Draw a circle using 'Oval tool' and convert it to graphic symbol.
2. Click on frame 10 and 'Insert keyframe' and drag your circle downward to change its position.
3. Click on any frame between frame 1 and 10, right click and choose 'Create Motion Tween'.
4. Repeat the steps by changing the circle's position at frame 20, 30 and 40.
4. Now you will have a bouncing ball movieclip..

*Really excited..Finally I did it hehe*

Next, Object brightness and colors.. 

There are 4 option of color which are brightness, tint, alpha and advanced.

For an example, we wanna change the brightness of our ball when it is bouncing, the steps are:
1. Select the frame, for example I select frame 10. Then change the color to 'Brightness' on the properties panel. Repeat the step for frame 30 or any frame that you like.. You can also try to use the other option tint, alpha and advanced *I have tried myself*... Happy trying ok ;)


Beside the color options, we can also change the object size of our graphic..
1. Select your desire frame, then click on 'Free transform tool' and just resize your ball. Its easy right?? 

ACTIVITY 3: NO 1
*Now its your turn to enjoy changing colors and resizing your ball hehe..*

SHAPE TWEENING

Object to object. We can change the shape of a object to another shape. Paham x?? Mesti x paham kan hehe..for example, we can change the rectangle shape to star shape by the following steps:
1. Draw a rectangle on the first frame, and draw another shape (for example a star) on the frame 25.
2. Click on any keyframe between frame 1 and frame 25, then select the tween from 'none' to 'Shape'.
3. Test your movie to see the transition of your shape.

Its really amazing!!! have a try ok.. =)

Now, how to change a text to an object?

1. First, type your text on the stage.
2. Click on 'Modify' and select 'Break apart' like the following.


3. Click on 'Break apart' once again.
4. Right click on frame 25, then 'Insert keyframe'.
5. On frame 25, delete the text and draw a shape.
6. Right click any frame between frame 1 and frame 25, choose tween form 'None' to 'Shape'.
7. Your text now is transform to an star shape.

ACTIVITY 3: NO 2
See..the flash text transform to star shape..amazing rite? 

Lastly, image to image..
1. Import a image to stage.
2. Click on the image to convert it to vector image, click on 'Modify', select 'bitmap', 'trace bitmap' and 'Ok'.
3. Choose frame 20 and insert keyframe.
4. On frame 20, delete the existing image and import a new imageand again convert it to vector image.
5. Click any frame between frame 1 and frame 20, then choose 'Shape' for the tween option.
6. Now, your first image is changing to the second image.

I'm done..how about yours??? Happy tweening k hehe =D

I'll continue the Motion Guide and Frame by Frame in the next entry k.. My eyes need a rest hehe.. daaaaa

Sunday, 17 March 2013

WEEK 5 : Drawing & Colouring..

Ok entry kali ni nak reflect on previous lesson.. kalau last week kite dah berkenalan ngan adobe flash cs3, so this week kite nak explore2 pulak la.. kami sume kena explore basic drawing & colouring using flash cs3 by video tutorial yg ade dlm apss2..mmg awesome sebab dlm video tu dah explain semua, so mmg sesuai utk beginner mcm sy sebab kalau x berapa nk paham, just replay je balik video tu berape byk kali ikut kesukaan hehe..agak excited ni so nk share step of basic drawing using flash cs3 kat sini..

1. For drawing a line, kite boleh click on line tool n drag je line tu kat stage..then kite boleh jugak tukar warna utk line yg dah dilukis by clicking on stroke color...kalau nak tukar thickness pulak boleh choose kat stroke height..boleh jugak tukar stroke style mengikut kehendak dan citarasa masing2 heee.. kat bwh ni saya bagi contoh line yg saya dh lukis : stroke color : blue, stroke size: 12, stroke style : solid


2. For drawing a curve, kite boleh gune line tool and selection tool.. agak susah nak explain dgn kate2 tapi untuk nak lukis curve, just gune selection tool and select the straight line, tapi kena make sure ade curve line kat bawah arrow selection tool tu.. 


3. For drawing various shapes, kite boleh click pada rectangle tool / oval tool.. we can change the colour of the shapes as well by selecting the shape, dan terus tukar kepada warna yg dikehendaki, simple je kan2??


4. Pencil tool.. function nye same macam pensel 2B atau pensel2 jenama lain, tapi special nye pencil tool dalam flash cs3 ni, kite boleh tukar pencil mode (straighten, smooth or ink)..ape perbezaan ketiga2 mode ni??? boleh view kat bawah ni ye..


5. Pen tool... pen tool pulak boleh digunakan utk lukis objek, macam senang jugak guna pen tool ni sebab kita just click pada point yg kita nak jadikan bentuk....contohnye, kalau kite nk lukis hexagon, click je pada 6 points, kalau nk lukis rectangle, click 4 points and so on.. jgn lupe last sekali mesti click edit and deselect all ok =)..

6. Basic coloring.. for coloring, kita gunakan brush tool, ink bottle and paint bucket tool.. eyedropper tool pulak kite guna kalau nak pick color sample.. lepas gigih melukis, now its time for coloring and this is the product of mine.. agak comot so kena improve lagi ni huhuhu..

ok x payah nk gelak2 ..sy tau drawing sy agak kaku haha..

Onion skin tool.. penah dengar x?? ianya bukan lah sejenis makanan ye haha.. saya pon first time tau ade tool macam ni.. actually tool ni sangat berguna untuk tangan yang kaku seperti saya.. mane x nye, tool ni akan bantu kita untuk trace gambar, cartoon character,  atau ape saje.. hebat kan?? Ok lets start explore this   onion skin tool..

1. Click 'File', "Import', select 'Import to library'.
2. Right click on frame 2, then click 'Insert keyframe'.
3. Click on frame1, then drag your image on the stage.
4. Go back to frame 2, and click on 'Onion skin' tool.
5. Now, start tracing your image on the second keyframe.
6. Right click on the first keyframe and select 'remove frame'.

This is my pooh by using onion skin tool
7. Start coloring your image..

Amboi, seksi plak menatang ni haha
8. Do not forget to convert your image to graphic symbol, click on 'Modify', "convert to symbol', choose the type as 'Graphic', then click 'Ok'. 

Maka terhasil lah The Pooh yang x berape nak smooth ni hehe.. kira ok la kan for first trial *ayat nak sedapkan hati*

orait, nanti kite continue lagi pasal the beauty of flash cs3 ni.. wait for the next entry k..daaaaaa =)

Friday, 8 March 2013

WEEK 4 : Flash, nice to meet u!!!

Semalam Dr. Zaida discuss 3 articles pasal authoring tu... drpd disscussion tu baru la nampak ape perbezaan antara Multimedia Courseware dgn Web Page Development & Authoring vs Programming Concepts (ade pros & cons), dan baru sedar yg summary aritu x menjawab sgt pon soalan Dr. Zaida hehe..

So kalau guna web page, semua org boleh access selagi ada internet, tanpa mengira bangsa, keturunan, umur, waktu dan tempat (kalau ade ipad, sambil baring2 pon boleh access web page hehe). tapi utk web page developer, kena fikir kan bandwidth, tapak, format utk video, sound, image, etc supaya web page tu nanti user-friendly.
Kalau guna multimedia courseware pulak, user kena beli courseware dan x semua org boleh guna multimedia courseware tu melainkan ade device macam cd/pendrive. tapi kelebihan guna multimedia courseware ni, developer boleh masukkan heavy video and high quality of image tanpa sebarang keraguan hehe..

Authoring ni lebih simple daripada Programming. authoring guna simple language berbanding programming, so kita x panggil programming language tapi guna term 'scripting' utk authoring. tapi utk hasilkan high interactive level of learning packages, kita kena gunakan programming.

Ok last sekali, how to choose the appropriate software? selain daripada apa yg ada dlm tiga2 article tu, kita kena tengok jugak sustainability, mean how it can compatible to the new operating system. so lepas ni kalau org tanye kenapa sy belajar flash, boleh la sy jawab hehe..

The bombastics part utk class semalam ialah semua org dpt ipad utk memudahkan lagi urusan pembelajaran..alhamdulillah.. so dlm ipad ni ade apps1 yg menerangkan secara keseluruhan pasal flash cs3, macam interface (apa function setiap tools, timeline, stage, properties,library), apllications & types of interactions. mmg sgt2 membantu utk new beginner macam sy ni hehe..

hi flash, it is nice to know u.. =)

ok nk pantun sikit..

buah cempedak di luar pagar,
ambil galah tolong jolokkan,
sy budak baru belajar,
kalau salah tolong tunjukkan. ^_^